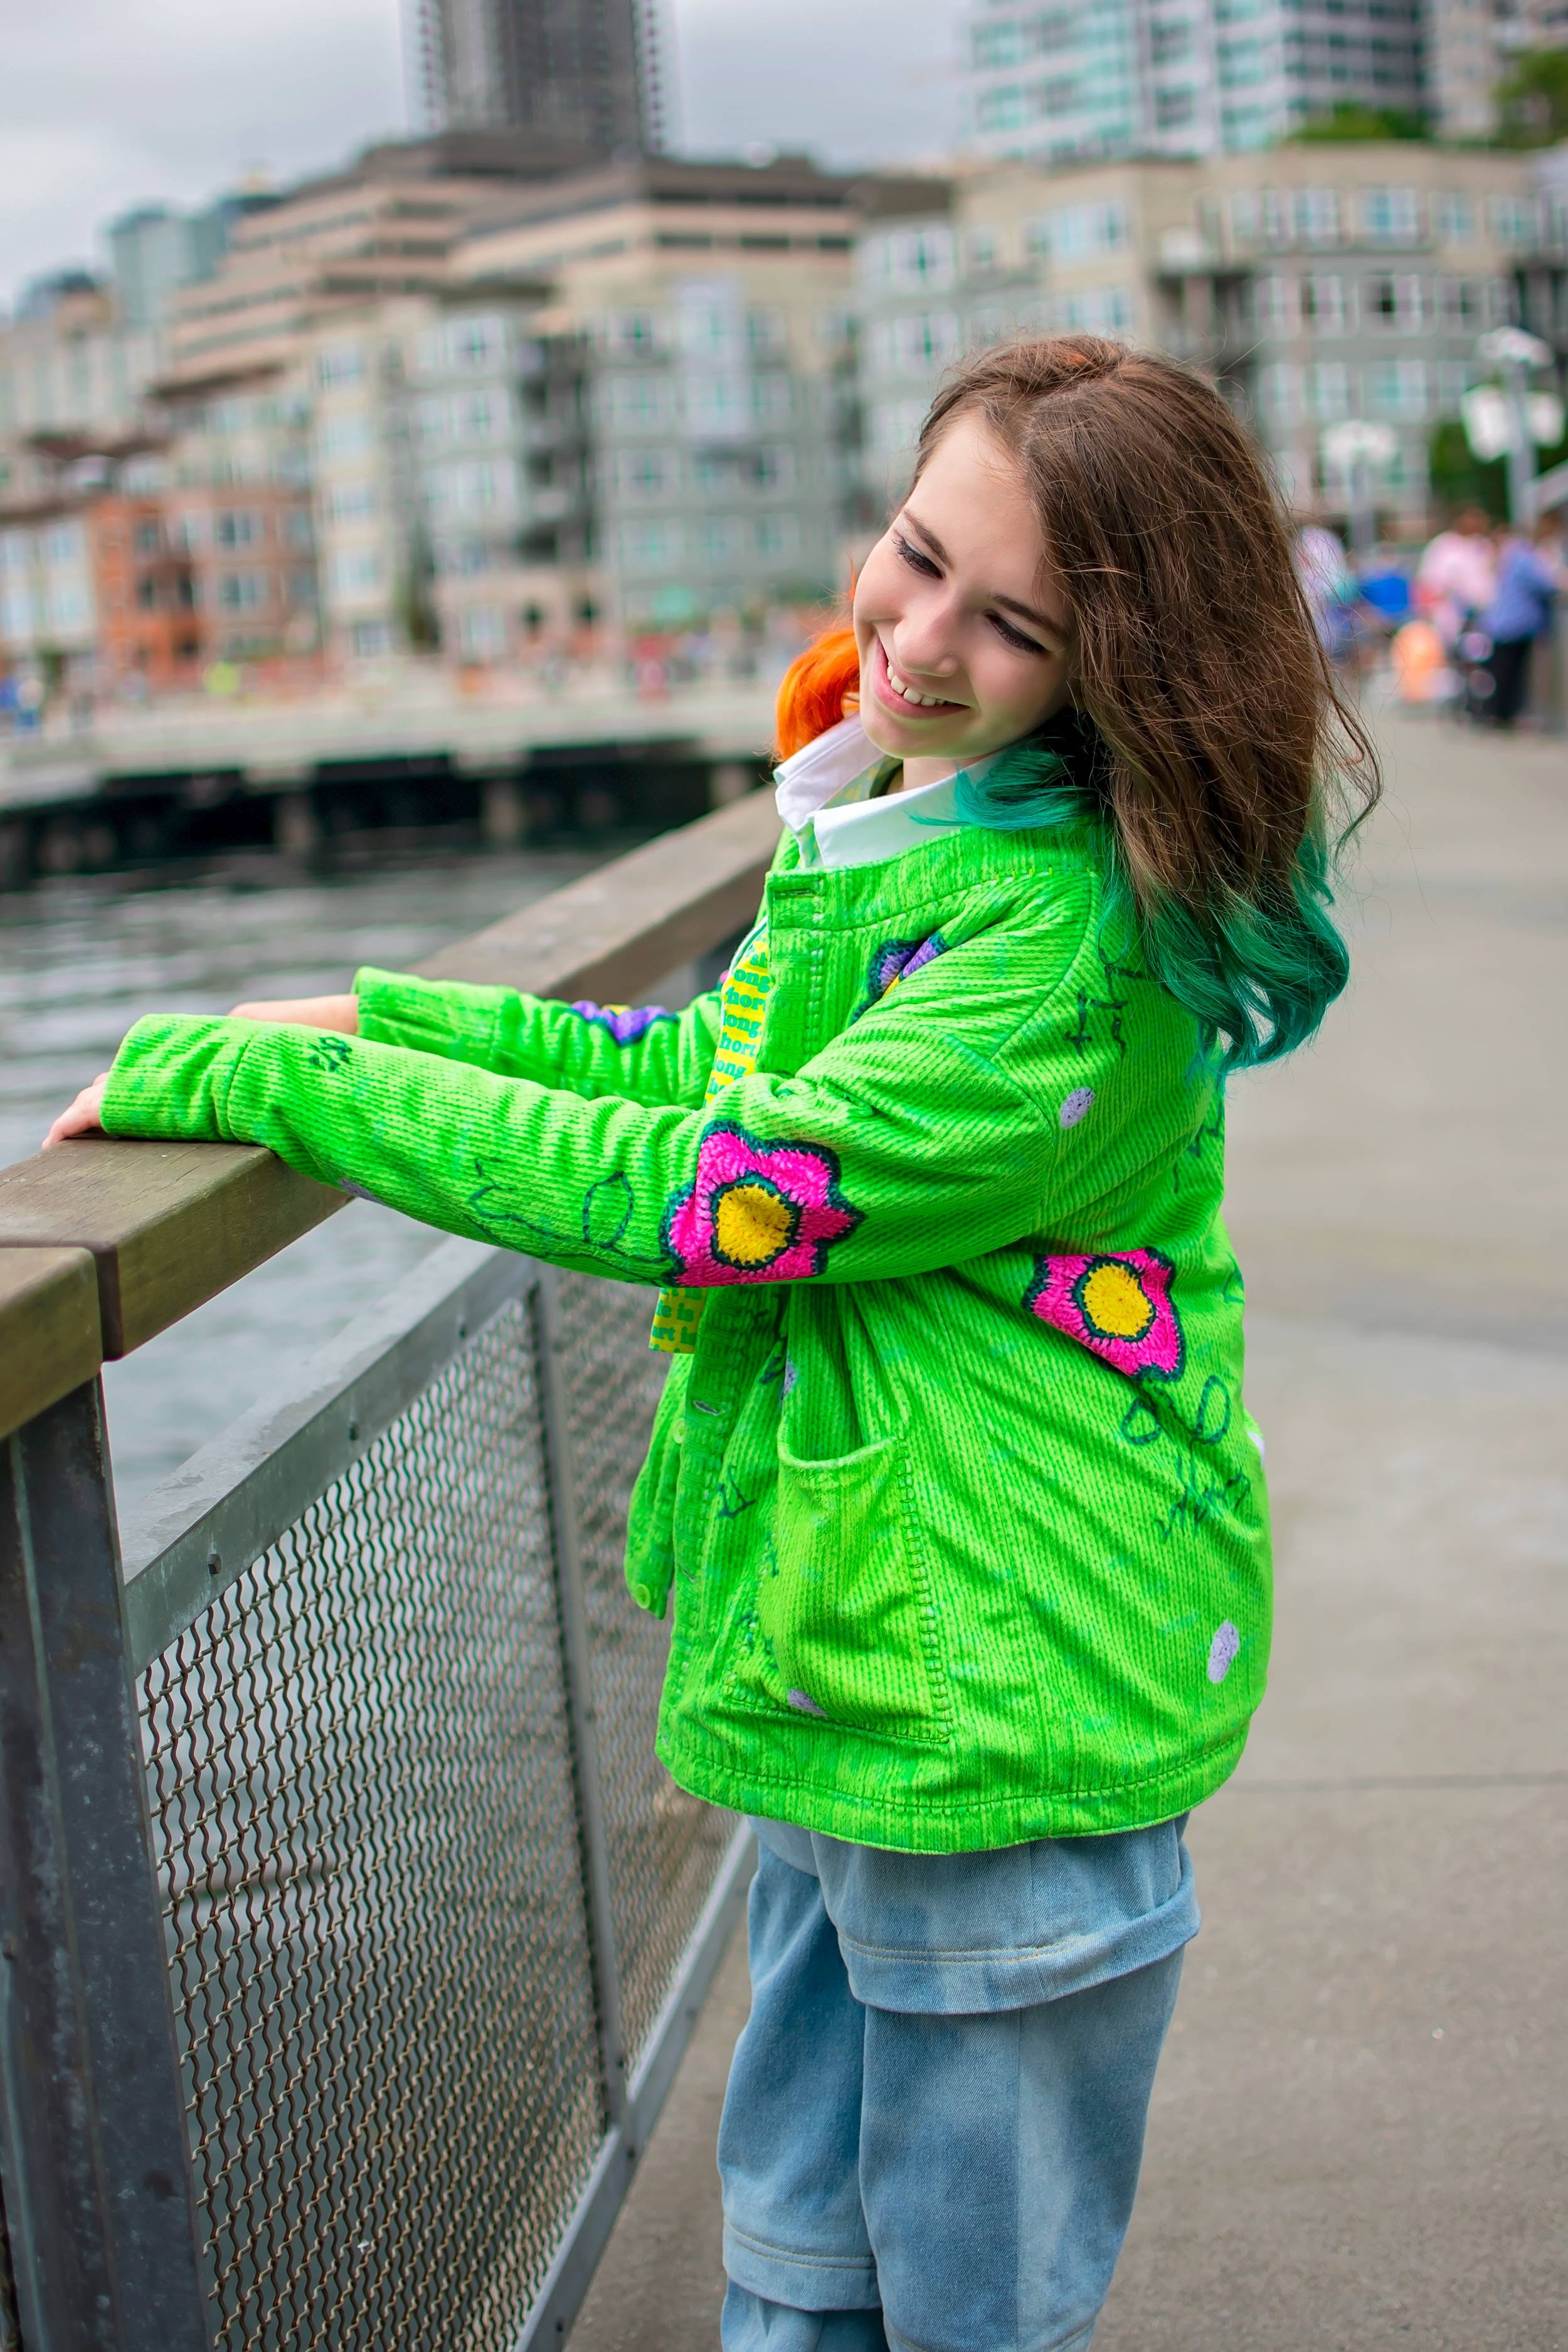
Neon Decklyn Jacket
Disclaimer: this post contains affiliate links. And while I did get the pattern for free, all the opinions are completely my own.
Happy February, Guys!
As some of you know, I'm part of the Blaverry Blasters Team, which means that I will be sewing a LOT of their patterns on a semi-regular basis! That's just fine with me because I lurv their patterns hard!
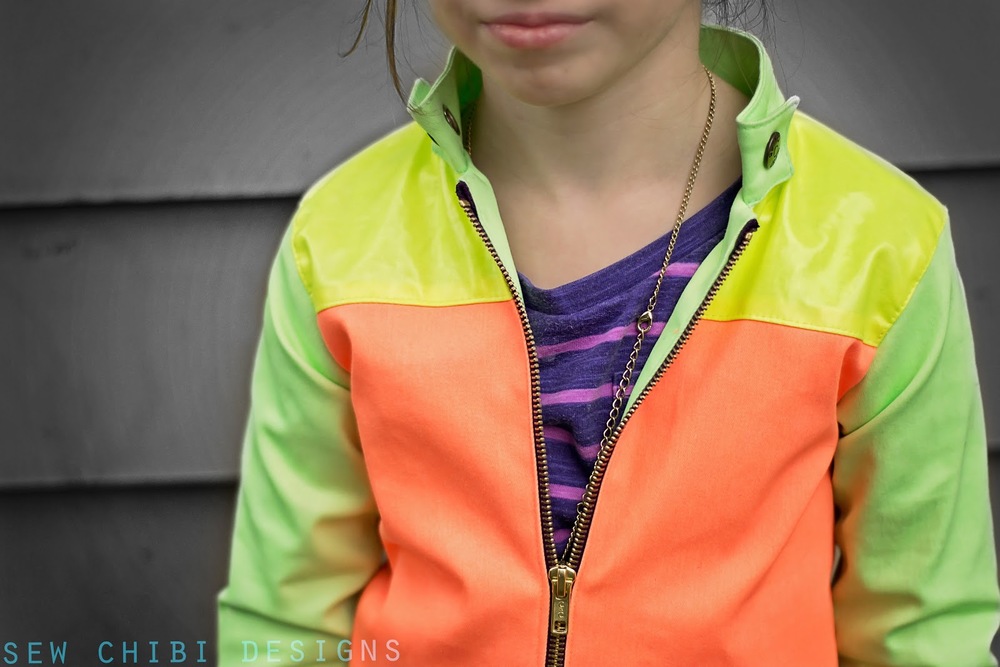
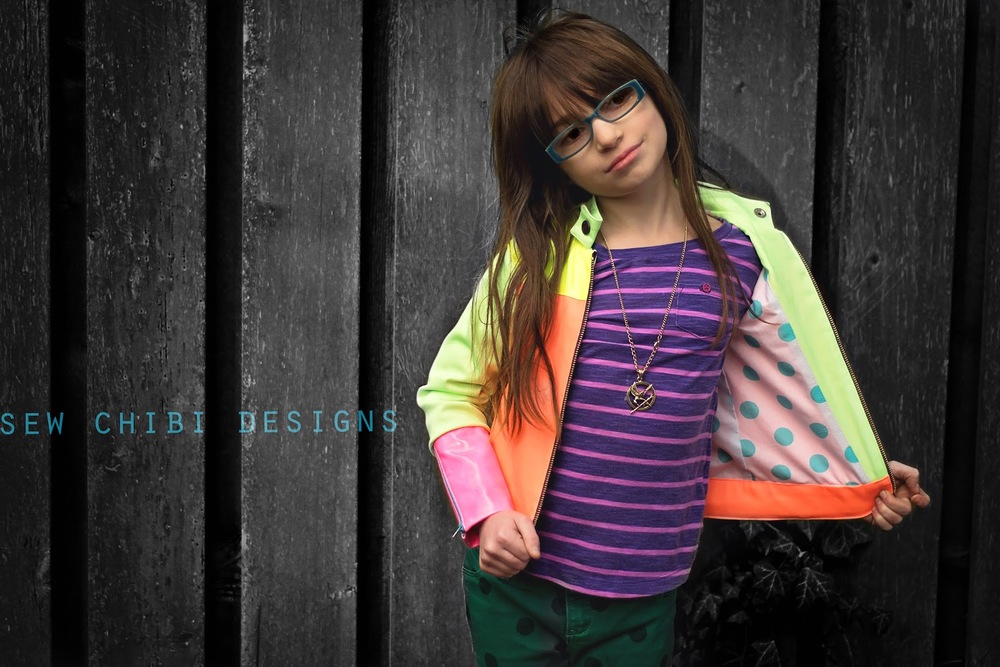
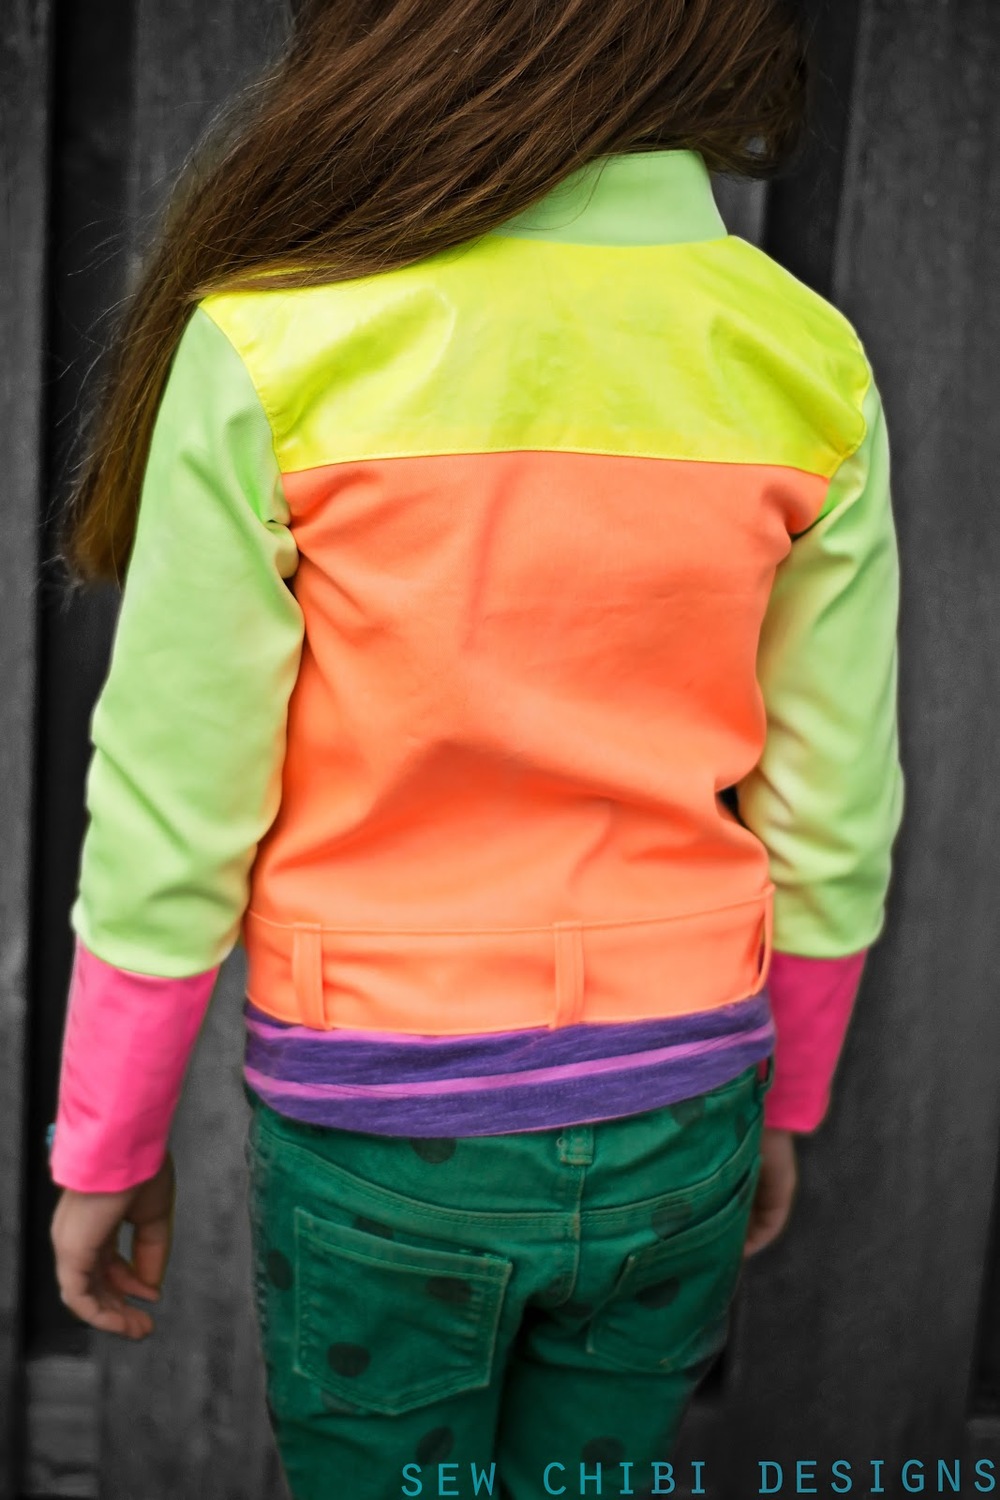
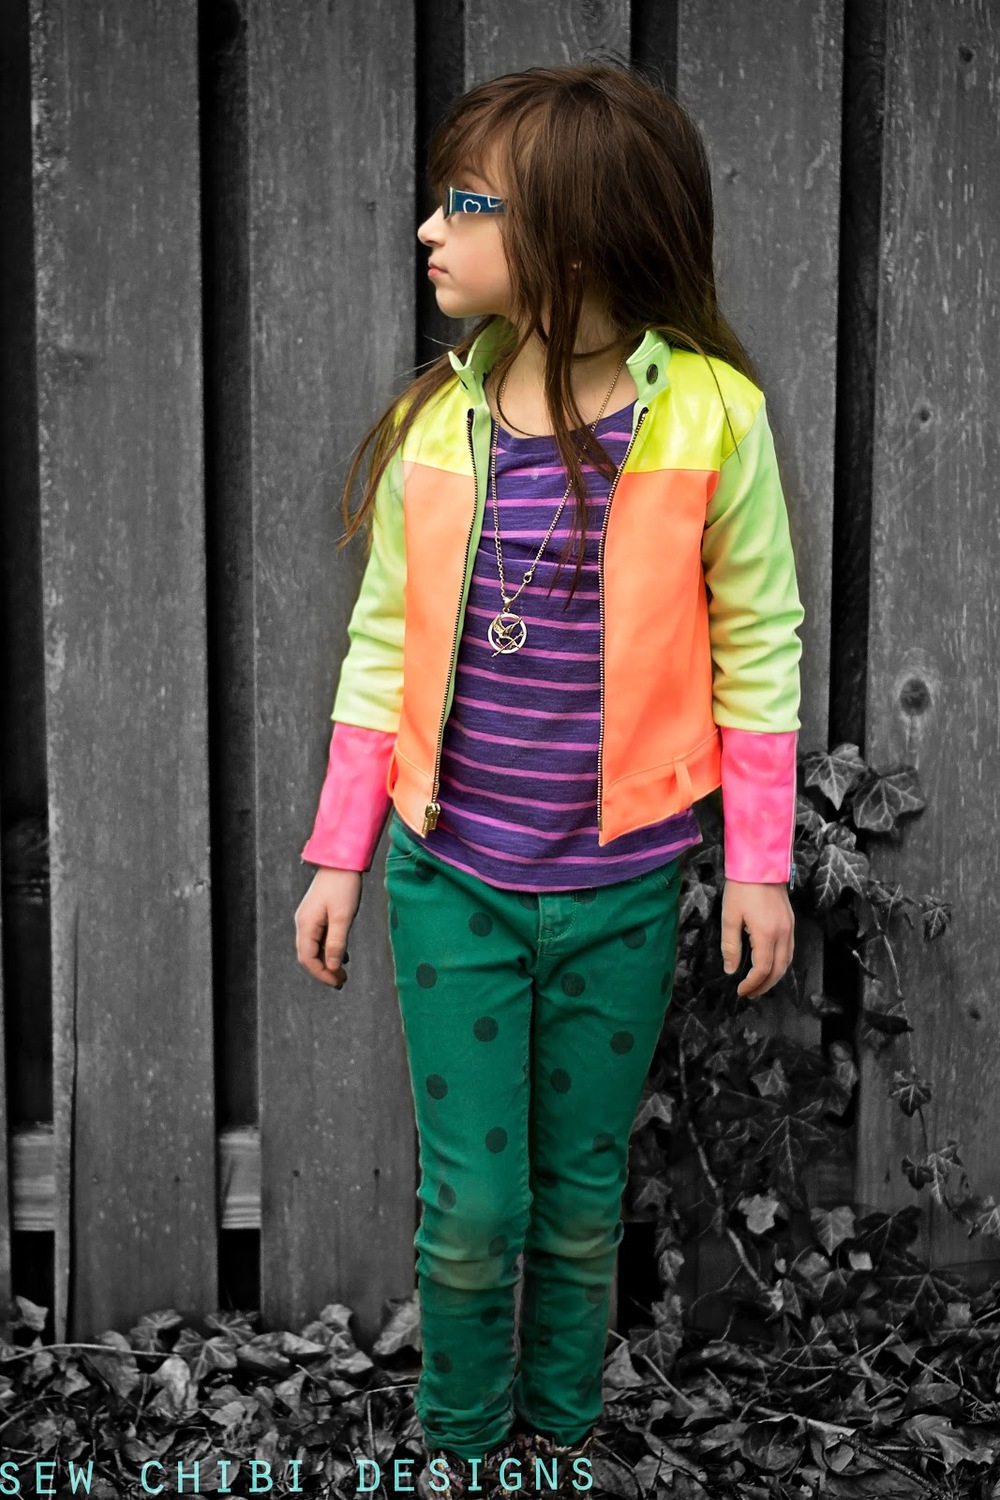
The current project I just finished was a pretty rad, cropped jacket called {affiliate link} Decklyn.

It's no surprise the jacket is one of the coolest I've ever made. I love any excuse to make something from anything laminate, pleather, or vinyl!
Major features include:
lots of color-blocking options
zippered cuffs
zippered front
fully lined
belt loop waistband
snap back collar

I chose to make mine out of these two neon twill cotton fabrics I'd been hoarding to make pants (whoops! well there's still lots left ;-), plus fabric from the Mitchiri shirt for the lining, and laminate cottons from Sephira's Birthday dress.
I had a few obstacles making my Decklyn: I had to size down a metal zipper for the first time. And then again for the second time when it wasn't short enough from doing it the first time. I channeled my inner MacGyver, and gathered a plethora of hodge podge equipment I thought might help me size down those little metal teeth. After clipping out the zipper stops with tiny scissors and then tweezing out the fabric from in between the stops I found myself in a quandary: how to get those itty bitty stops opened just enough to slip them on to my zipper without breaking anything or going insane.
Laugh if you will but here what I used (and what worked for me):
The pliers were for the nipping off the teeth... a LOT of teeth and in a safe manner so as to not hack up the zipper fabric. After that, I melted the zipper fabric just enough to make it all nice and finished looking again.
The corkscrew blade and nail file were for shimmying twisting open those stops. I fixed the blade in one direction and then I twisted the nail file in the perpendicular direction. Surprisingly, it turning out to be the safest and most effective way for me. To finish, I used the pliers again to close the stops shut. Yes, I know, I know, there are more efficient ways to resize a metal zipper, but if you don't feel like leaving the house and you don't have the right tools, maybe give my knuckle-headed method a try!
Don't you love her Mockingjay necklace!?!
Our little photo-shoot distraction!
One of my goals when trying a new project is to learn a little something. Whether it's a technique I'd never done or sewing something in a way I wouldn't have thought of, I love the growing process involved. With the Decklyn, there was all sorts of stuff I'd never tried before: those zippered cuffs, sizing down that %$@* metal zipper, and installing heavy duty snaps. Adding those to my mental sewing arsenal: check!

The fit is nice and slim and will be invaluable come spring. I'm thinking about making a complementary belt to go with it. Someday ;-)

Azriella thinks it is SO cool. And guys, I reeeeaaalllly want to make and all pleather one or all suede with fringe or something.... mmmmm...

Well that's all I've got for now! You really should go check it out and seriously consider buying it. As with all Blaverry's patterns, the sizing is from 2T all the way up to 16years. I mean, it's sorta ridiculous how amazing the size range is. I know, for me, when I bought my first pattern from them, it was THE selling point (and the friggin sweet look of the patterns themselves of course).
I look forward to sharing with you all some truly awesome plans that are a' brewin'.... hint: SEW GEEKY
hugs + stitches + many many smooches,
kat


YAY! You're here! I'm so happy! I'm Kat! Mom, shawol, and pattern designer, this is the place where I share all of my sewing projects, chibi cosplay fashion, and DIY/tutorials! Everything around here is action-packed with color, silliness, and tons of kawaii stuff!