Free Pattern! Mitchiri Neko Spring Top
OH HAI THERE!!! Today I am over at the Sewing Rabbit for my first time as contributing guest editor there, sharing a free pattern and tutorial for a yummy, scrumptious, kawaii spring top inspired by the Mitchiri Neko YouTube videos! A shout out to my rad friend, Mikey, who introduced me to the video. Go check it out here!

Here's the post in full from the sewing rabbit!
Mitchiri Neko Shirt DIY
Well, hello there, Sewing Rabbit readers!! I can’t believe this is real! This right here is the stuff dreams are made of: being a part of the Sewing Rabbit Team! *le sigh*! I won’t let you down, folks. I going to do my best to bring you some action-packed fun and cuteness every time you see me here! Promise! I really wanted to do something special that I’ve never done before (so bear with me): a self-drafted multi-sized PDF pattern. It’s free (yay!) and it’s for sizes 12months to 5 years but could easily be graded up or down as you please.
What is Mitchiri Neko you ask? You know those little cute cat emoticons you share every day? THAT is Mitchiri Neko!

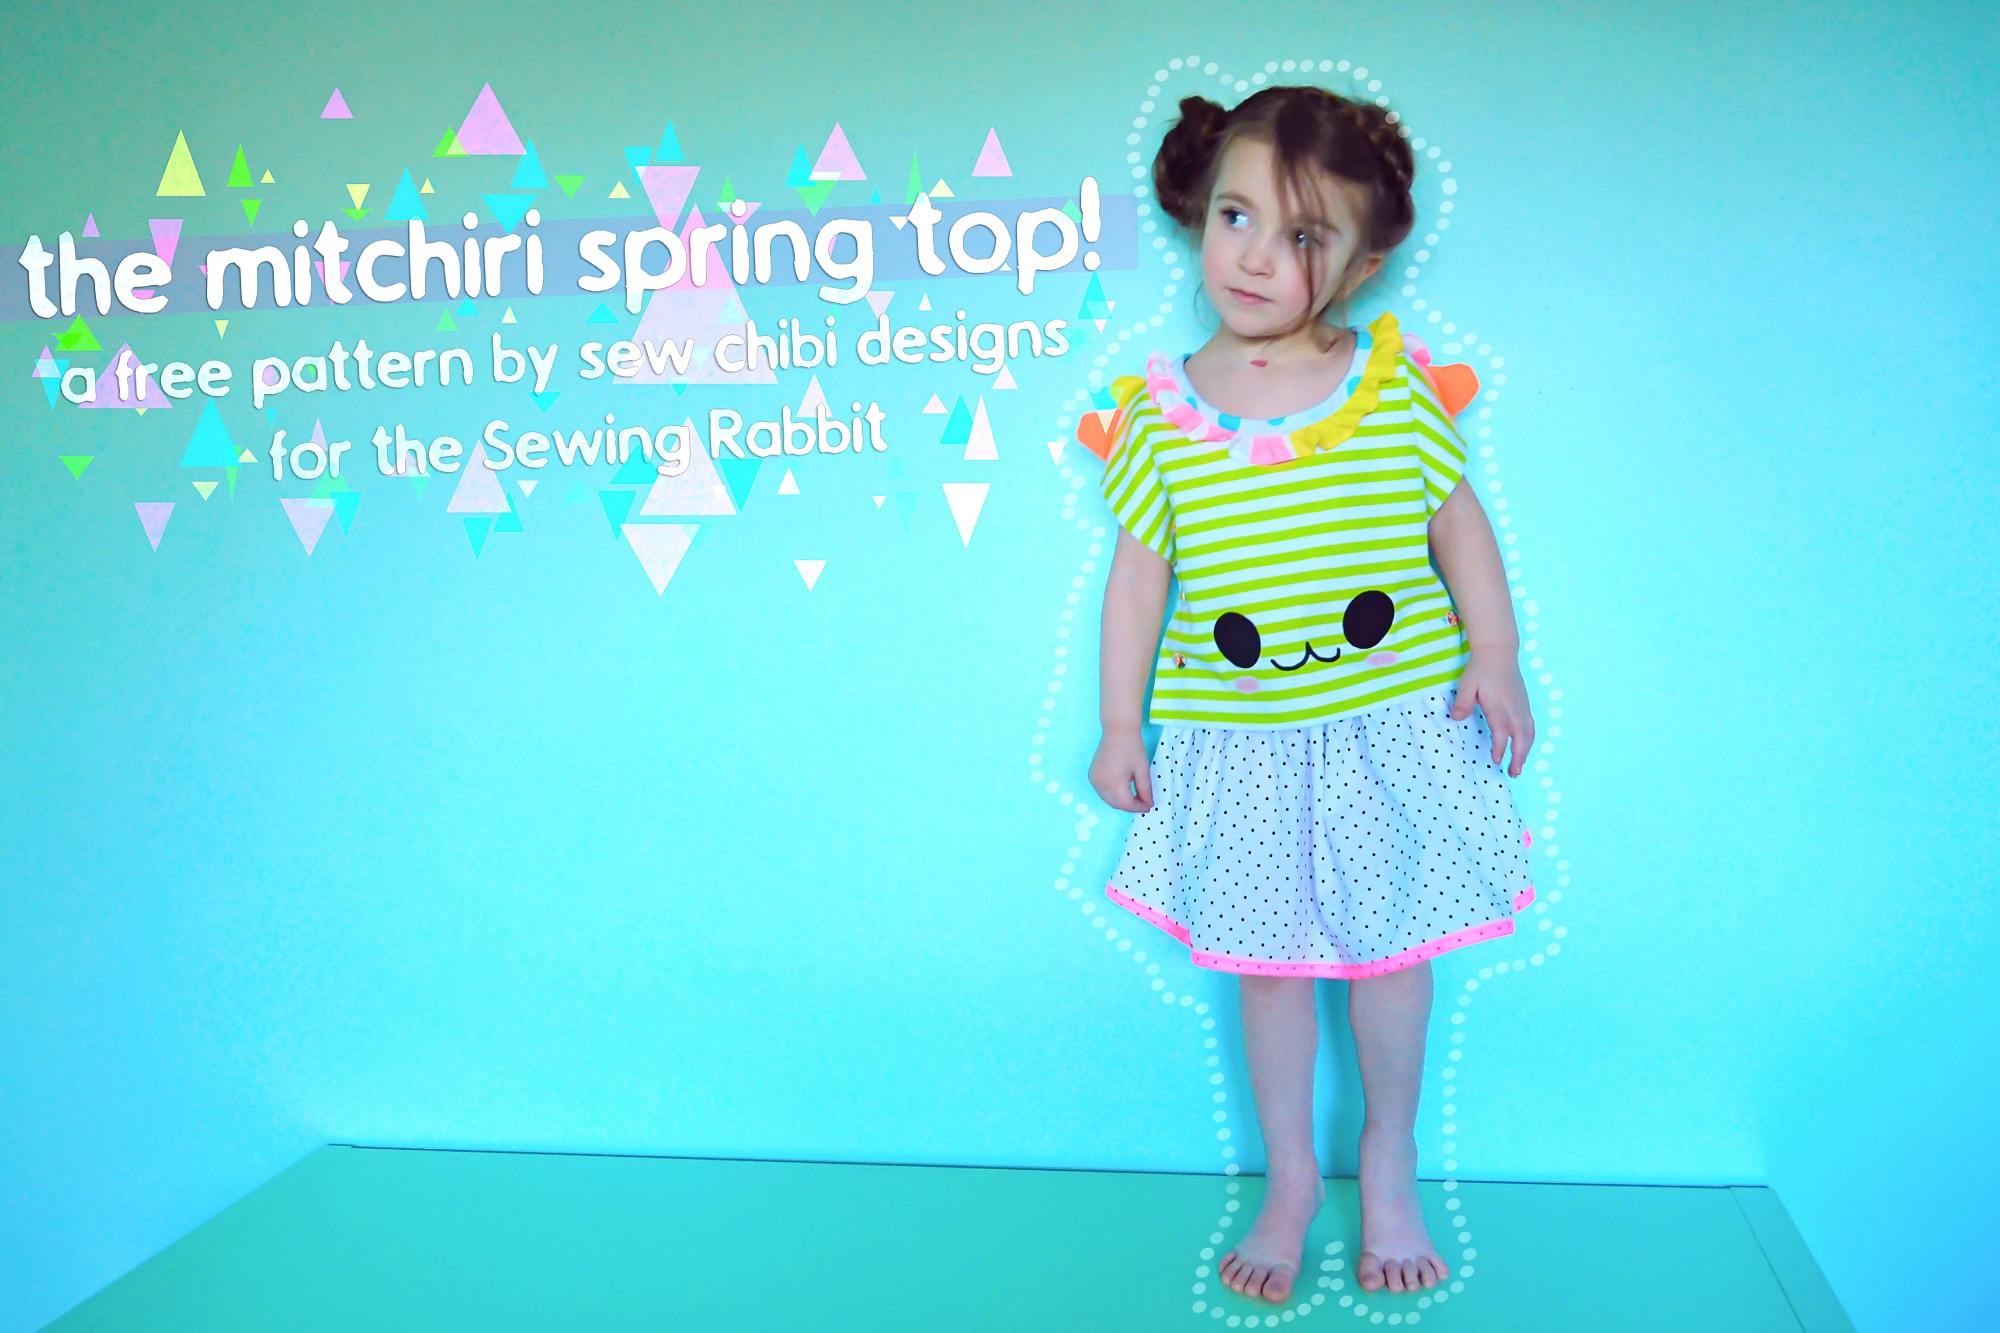
I know that in most parts of the world it’s snowing, but, here in the Pacific Northwest, the trees are already blooming with flowers! Springtime is here! What better way to celebrate than with a sweet customizeable top?! It’s perfect for many occasions: you could dress it up with a skirt (Ahem, Easter Bunny anyone?!) or down with shorts or pants… And I love making clothes with a sense of humor because kids love wearing things that are a little silly, don’t they!?


MATERIALS:
MITCHIRI SPRING TOP FREE PATTERN + free face printable (sign up to my newsletter to gain access to my secret freebies library!)
1 yard of medium to lightweight woven fabrics (…more or less depending on size. If you are doing a different color for the front and back, you will need less of each.)
Fabric for the ruffle (2”long and twice the width of the neckline plus 3/4” for seam allowances. If you want to do two different colors like I did, then cut two pieces that are the width of the neckline)
A 2” wide strip of bias binding as long as your neckline.
Scraps for the shoulder puffs
Lightweight Fusible Interfacing (for buttons and buttonholes)
A small amount of batting for the shoulder puffs
Thread and other basic sewing supplies
6 buttons (5/8” to 1” in dimension)
Iron- on transfer paper for dark colors (optional. The paper for dark colors ensures maximum opacity.)
Approximate sewing time: 1 – 2 hours
Skill Level: For adventurous beginners

HOW TO:
~Download the Pattern~
Step One: Download the pattern (be sure to click “none” when your printer asks about page scaling) and cut out in the size you need. The top is meant to be a modest crop top so if you want it to be longer, there shouldn’t be a problem adding to the length to the hem since it’s a boxy top. Tape the pieces together matching up the lines in the size you chose and lining up the triangles to the edge to make diamonds. Double check that the test square on page 2 is 2” X 2”. Also keep in mind that you will be cutting the bodice piece at the indicated front neckline once and the indicated back neckline once.
~Cutting~

Step Two: Match up the fabric for the bodice front with the right sides together. Cut one on the fold at the dotted neckline. Repeat for the back bodice at the solid neckline. Cut out four small shoulder puffs (right sides together) and repeat for large puffs. Cut a piece of bias binding 2” wide by the total length of the neckline (the size 3 is about 19”) by lining up your selvedges and finding the 45degree angle and cutting a two inch wide strip as such. Using the total neckline length measurement, cut a strip of fabric 2” wide by double your neckline (or two separate pieces, adding in 3/8” seam allowance to each edge). Make sure to add 3/8” seam allowance to the edges. Cut four strips of lightweight fusible interfacing that are about 1 ½” wide by 7” long.
~Prepare Your Pattern Pieces~
Step Three: Transfer buttonhole markings using the buttonhole guide and the approximate placement on the pattern piece. If you need a little more armhole space, move the first two buttons down a smidge, but make sure to leave about 3” from the front bodice edge to the bottom buttonhole. And if you need it to be a little bit more fitted, just shift the buttonholes in as you need.
Step Four: Using the instructions on the package, apply interfacing to the wrong side of the fabric front and back at the sides, making sure to center it around the middle buttonhole marking.
~Sewing Instructions~

Step Five: Match two of the same sized shoulder puff pieces and sew them together along the curve, right sides together, using a ¼” seam allowance. Repeat for remaining puffs. Clip seam allowance to 1/8”. Turn right side out. Press if you please but it’s your choice.
Step Six: Take a pinch of batting (I like a lot so it looks extra puffy) and stuff your puffs.
Step Seven: Center the puffs, side by side, on the shoulder edge of the bodice front, pinning in place as you go.
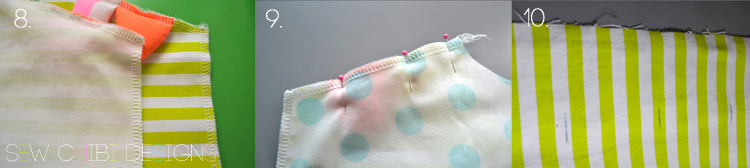
Step Eight: Baste them in place ¼” from the shoulder edge, making sure to catch all three edges thus closing the puffs. Repeat for other side. Finish all shoulder edges by serger or zigzagging over the edge. Return to a normal stitch length.
Step Nine: Right sides together, pin the back bodice to the front bodice at the shoulder and sew using a 3/8” (1cm) seam allowance. Carefully press the seam allowances towards the front, turn right side out, then top-stitch using a 3mm stitch length. Repeat for other side. Return to a normal stitch length.
Step Ten: Switch out your regular sewing foot for your buttonhole foot (*or if you don’t have one do two tiny, tight rows of zigzag stitches as long as your button plus a little bit more, then switch to a larger stitch length across the ends to secure them).
Making sure they are perfectly aligned, sew your buttonholes. If you are inexperienced at this, practice on a scrap of your fabric first. Return to regular sewing foot. Next, using your buttonholes as a guide, mark the placement of the buttons on the back bodice and hand sew them in place or machine sew them with a 0mm stitch length, lowering your feed dogs first. Here’s a close up of my buttons:

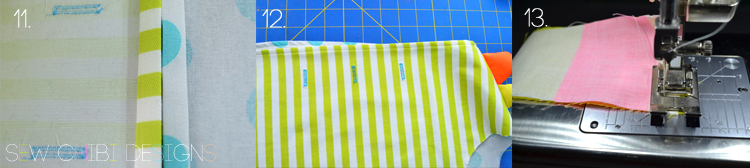
Step Eleven: Finish the edges of both sides and bodice bottom. Then fold your sides under ¼”, press, and then fold again by ¼” and press again. You may choose to pin this fold down if you please. I am not an avid pinner. Awful, I know.
Step Twelve: Turn over to the right side, lengthen your stitch length to about 3mm-3.5mm. Start stitching from the bottom of the bodice front side, over the shoulder, and back down the bodice back to the bottom. Repeat for other side. Return to a normal stitch length.
Step Thirteen: Grab your ruffle piece(s) and sew them together along the short edges, right sides together, using a ¼” seam allowance, to form a tube.

Step Fourteen: Fold under your ruffle along one of the long edges by 1/8” to ¼”, press, fold again in the same manner, and press. Alternatively, you could use a narrow hem foot, but I don’t have one of those! Once again, pin along the fold if you choose. On the right side, topstitch 1/8”-1/4” from the edge.
Step Fifteen: Switch the stitch length to its longest setting. Sew two sets of basting stitches, one that’s 1/8” from the edge, and another that is 3/8” away from the edge, making sure to leave thread trails of about 5” on each end. Pull the bobbin thread trails to evenly gather the fabric to match the neckline.
Step Sixteen: Find the center back of the bodice and center front of the bodice and make a tiny mark. Repeat for your ruffle, or, if you used two different colors, use the seams as your marker. Pin the ruffle in place, ruffle wrong side to bodice right side, matching the center front of your neckline to the center front ruffle and repeat for the back. Pin around the rest of the neckline and baste in place, 3/8” from the edge, all around. Return to a normal stitch length.
If you have already made or packaged bias tape, skip to step 17.
Otherwise, to prepare your bias strip first by squaring off any diagonal ends and cutting them off. Next, fold the long edges towards the wrong side towards the center by a half inch on each side. Be as perfect about matching the edges to the center as possible. Press. Then fold in half again along the long edge, encasing the fold edges, along the bias strip center.
Press again really well.

Step Seventeen: Measure your bias around your neckline, then add in ¼” for seam allowance. Clip off any excess. Unfold the bias at the short seams and stitch together with a ¼” seam allowance. Press seam allowance open, then refold the bias seam and press again. Now, matching the bias edge with the neckline edge, right sides together, pin the strip around the neckline. Starting at the back seam, sew along the crease all the way around. Fold over the bias towards the back, encasing the neckline’s raw edge, and pin. Pin a little more towards the back so as to ensure the next part is done properly.
Step Eighteen: Starting in the back, carefully stitch in the ditch (in the actual seam. See pic for clarification.) all the way around making very sure that you are catching the bias underneath. Press neckline.
Step Nineteen: Fold under the bodice front bottom edge towards the wrong side by 3/8”. Repeat for back bodice.

Step Twenty: Fold again by 5/8” and press. Repeat for back bodice.
Step Twenty One: Stitch ½” from the edge of the front and back bodice.
Step Twenty Two: (Optional) Print out the face download on to transfer paper for dark colors. Cut out your face pieces and take off the backing. On a hard, non-porous surface, place your pressing cloth underneath your bodice front. Place the face pieces where you want them carefully. Using the overlay paper from the package or otherwise tracing paper, place it on top of your face (don’t use a pressing cloth and don’t iron on directly… I’ve learned that the hard way.) Iron on the face for a full minute, constantly moving the iron so as to not burn. Defer to your package instructions if you have any questions about this part.

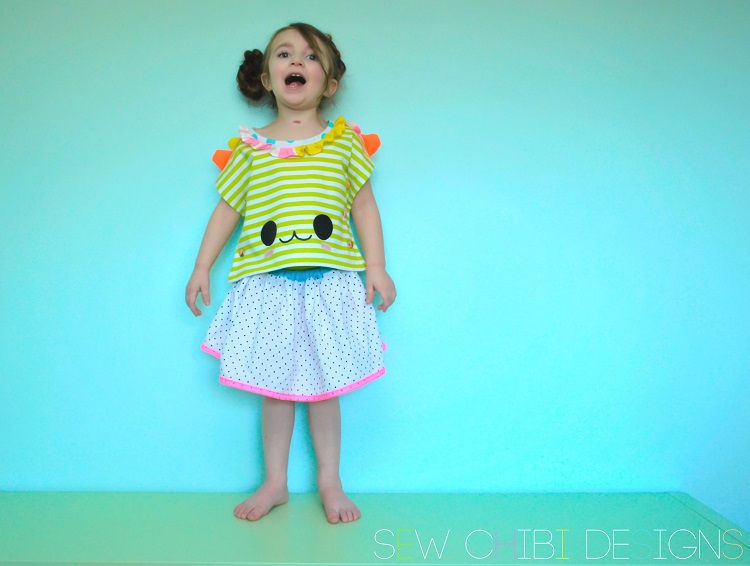
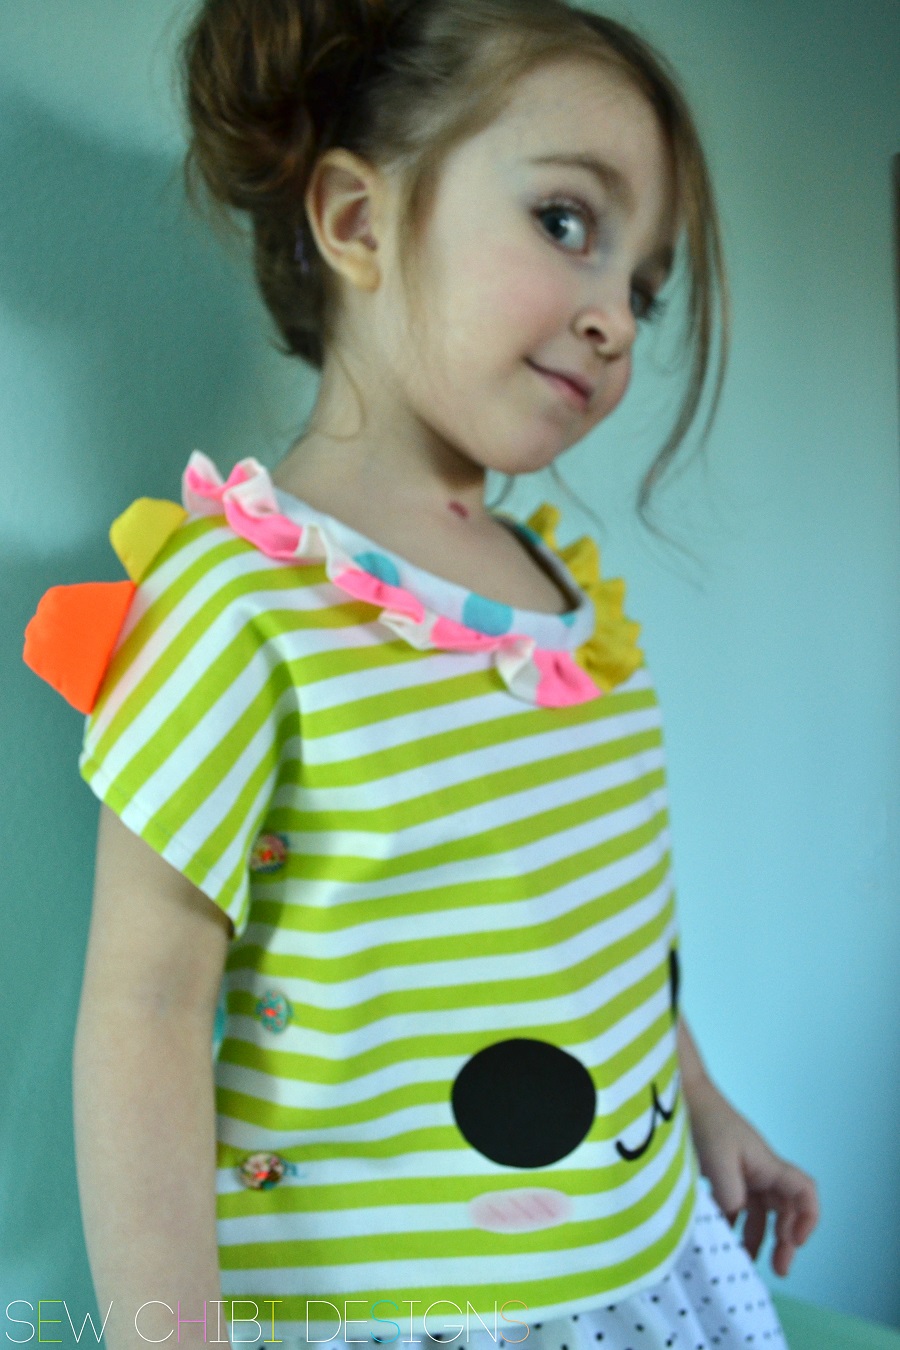
So here’s the finished front!
I made a little skirt to go with it and did a contrast waistband and a hem binding of neon pink nylon organza.
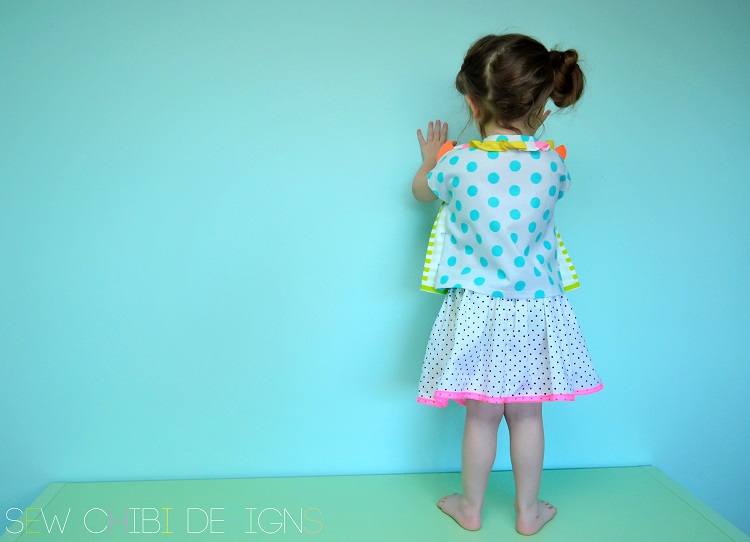
And the back!


And yeah! You have got one super adorable, kawaii top that is perfect for spring! You can choose to add all the embellishments or leave them out… so many choices!


And if you are wondering where the name came from, you need to see this Mitchiri Neko video YouTube. It is probably one of the cutest things you will see all day. (Besides my darling daughter of course!!!) I was referred to it by a friend and my girls L O V E them. It’s worth a watch!
Doesn’t it just make you happy? I hope you all are inspired to go whip one up for the littles in your life!
Hugs & Stitches,
Kat
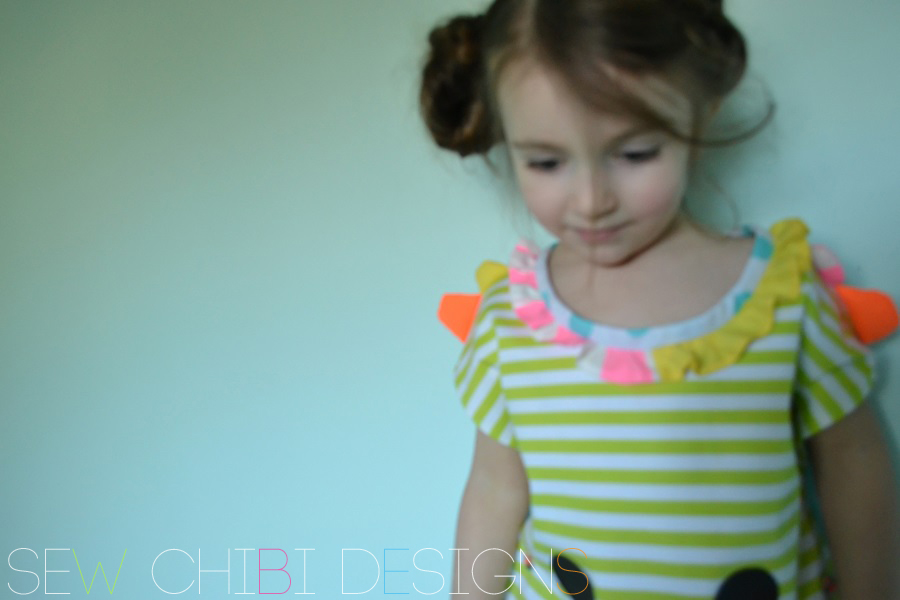
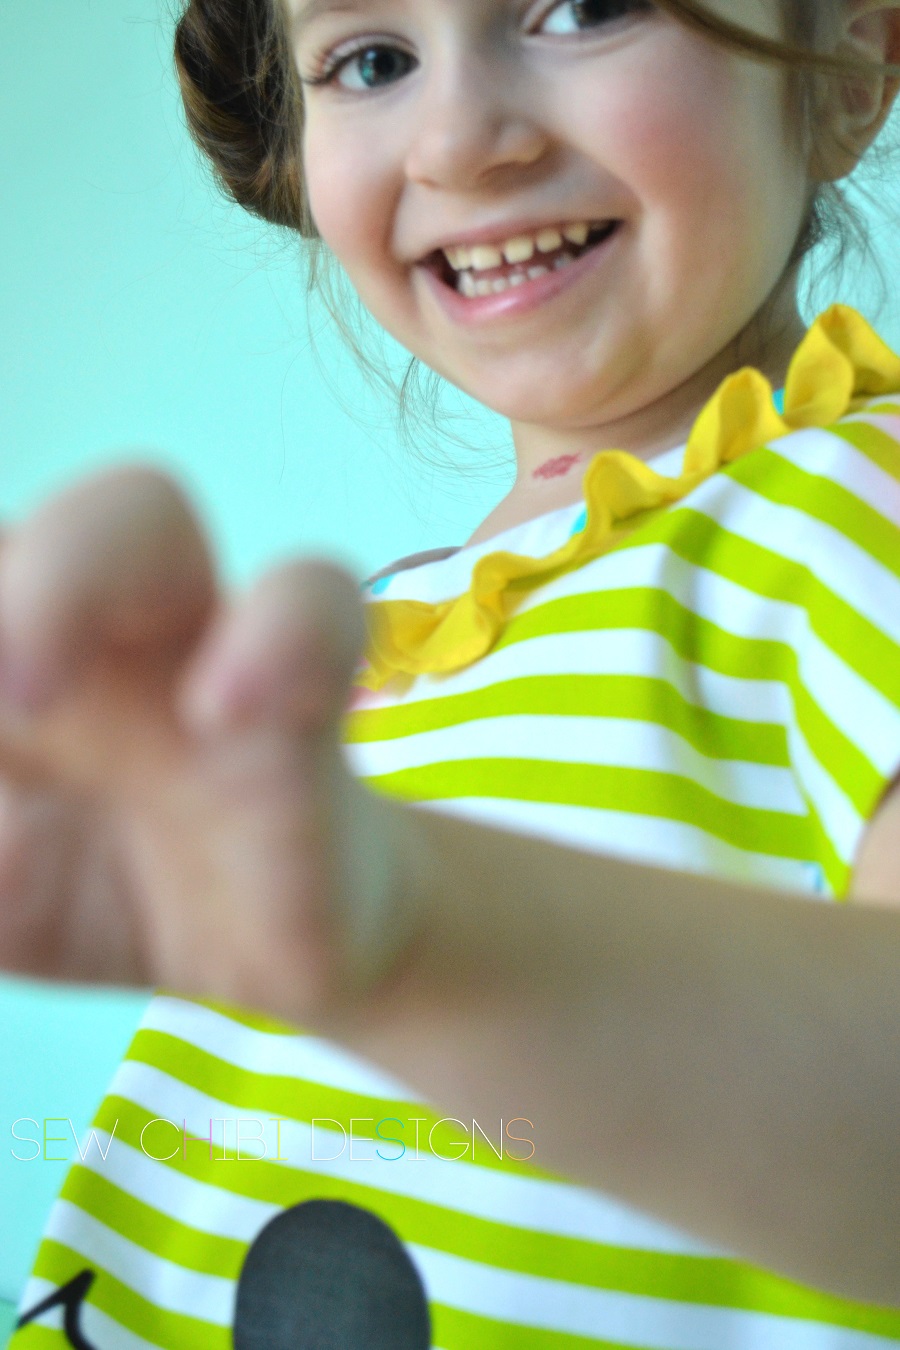
Here's some out-takes for your enjoyment!

many many smooches,
Kat


YAY! You're here! I'm so happy! I'm Kat! Mom, shawol, and pattern designer, this is the place where I share all of my sewing projects, chibi cosplay fashion, and DIY/tutorials! Everything around here is action-packed with color, silliness, and tons of kawaii stuff!